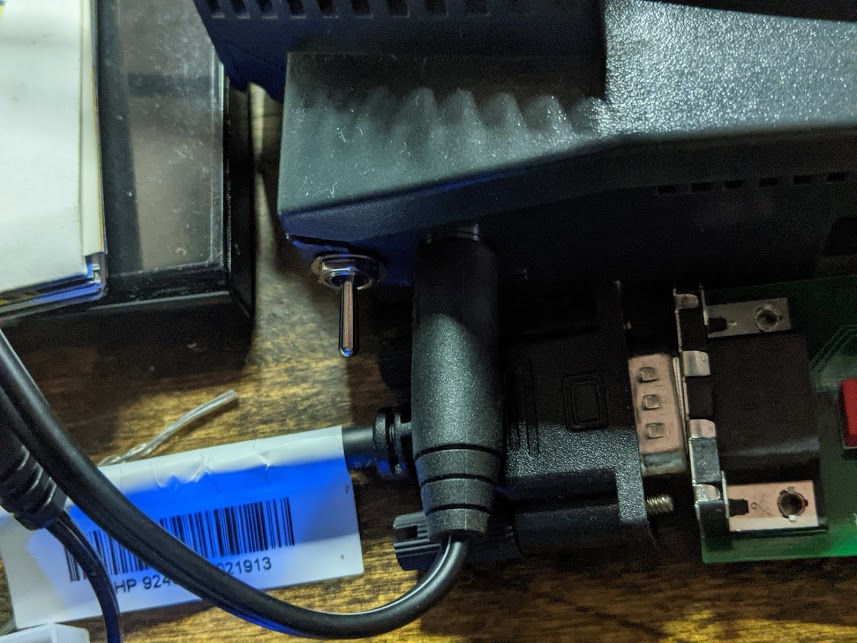
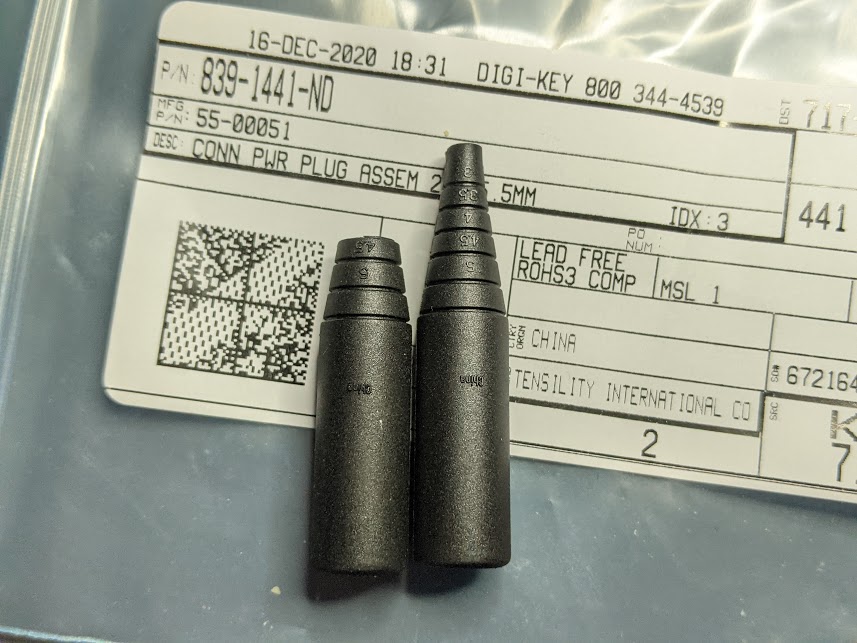
I got a bundle of Jaguars and Misc. parts, some in working, some in non-working condition off the bay the other day. One of the items included was an OEM power supply with the connector missing from the end of the cord. This was easy enough to repair with a few tools and a $3 part from DigiKey (Tensility Power Barrel Connector plug, 2.10mm inner diameter, 5.50mm outer diameter, part number 55-00051):
If you're really pressed for cash, you can find these for as little as $1 I think, but I didn't like the look of the cheaper ones and sprung for the extra quality. I bought 2, because I always mess something up the first time through, and I'm glad I did, because this repair was no exception.
The first step here was to strip back the two wires coming out of the wall wart a bit and determine for certain which one was the ground line. It's supposed to be the one with the white line down the side of it (and it was), but if you get this wrong it will fry your Jaguar's chips and you'll be looking at a much more difficult repair, so if you have a multimeter handy, double-check this.

Next, trim off a bit of the outer sleeve to allow it to fit over the relatively thick insulation on the pair of cables from the plug, as described in connector installation instructions from the manufacturer. I found cutting at the groove between the "4" and "4.5" demarcations resulted in a good fit for the chunky Jaguar power supply seen here, but you may need to leave a little more sleeve for the other model, which I believe has a thinner cord.
Next, slide first the outer sleeve, then the inner sleeve down the wire a bit, being sure not to slide the inner sleeve into the outer sleeve just yet, as described in the instructions.
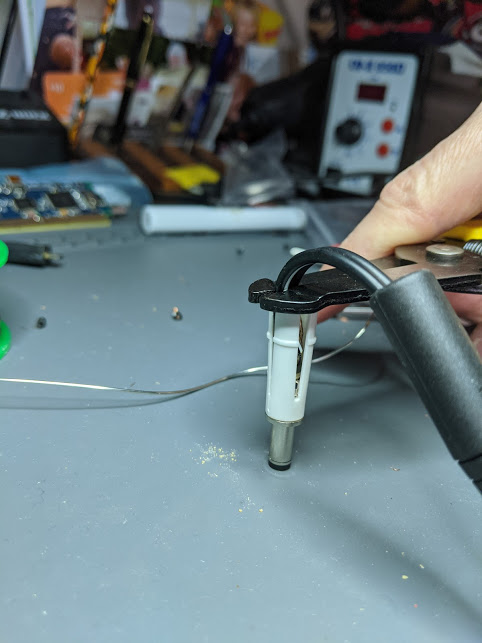
Now here's where we need to deviate from those instructions a bit: Connect the negative wire (again, usually the one with a white line on it), to the center portion of the jack, and the positive wire (no white line) to the bottom/outer portion of the jack, as shown here:
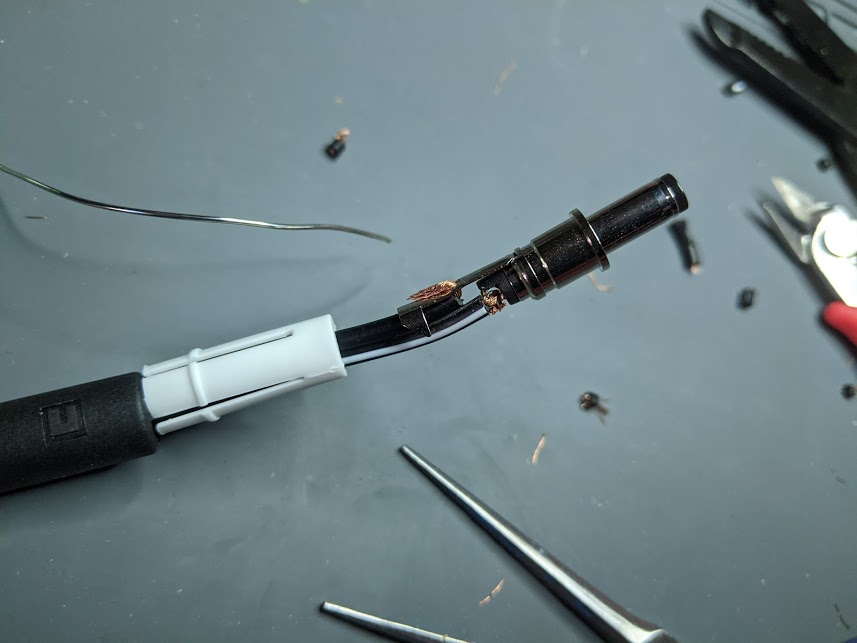
Again, this is critical. If you mix this up, you'll most likely fry your Jaguar. I got this backwards the first time even though I knew the Jaguar uses center-negative connectors because I was blindly following the connector's assembly instructions, and I didn't realize my error until after I'd soldered things up and put the sleeve on. I had to cut the wire again and toss that connector assembly out, so to make sure, stop here, plug the power supply in, stick the negative (black, generally) probe from your multimeter down the center of the loosely-wired connector, and touch the positive (red, generally) probe to the outside. It should read something like 9-12V DC. If it shows up negative (and you've double checked you have your multimeter set up correcctly), you've done things incorrectly and need to switch your wiring around before proceeding.
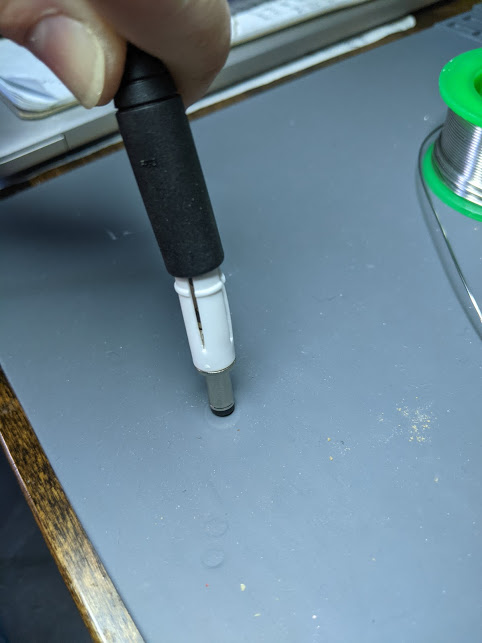
Next, solder the wires to the connector per the instructions:
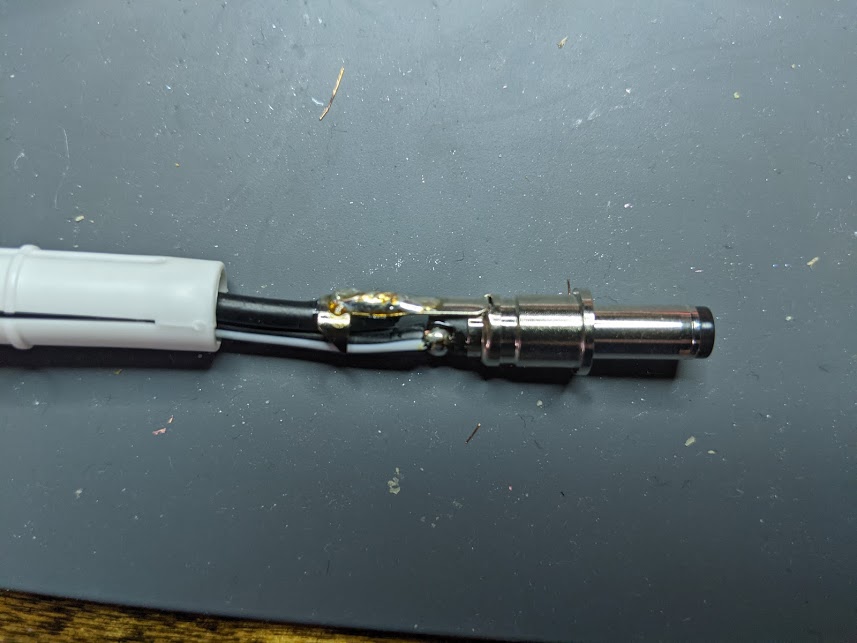
And crimp the cable as best you can with some pliers, being extra careful not to puncture the insulation given the wires don't actually fit that well in the little clamps:

Next, snap the inner sleeve in place. The instructions reference an assembly tool just for this purpose, but I didn't have one of those. Instead, I just leveled the end of my wire strippers over the top of the sleeve, steadied the other end of the connector on my silicon mat, and pressed them down until I felt and heard the sleeve snap into place. Don't be afraid to apply a reasonable amount of pressure here. It's stronger than it looks.
Finally, slide the outer sleeve over the inner sleeve. This takes a fair amount of pressure as well, and I accomplished it by gripping the base of the sleeve and pushing it down into my silicon mat again:
The end result should look like this:

Almost as professional-looking as an original mint unit right? Well, close enough anyway. Double check the polarity one more time (center should be negative) with your multimeter if you're as paranoid as I am, then plug it in and give it a go!