Back To My Jaguar CD Repair Guides | Linkovitch's Jaguar CD repair guides
I wanted a second Jaguar to add a BJL BIOS and 50/60Hz switch to without risking the one I had for daily use. However, prices were especially bad on EBay at the time, so the best deal I could find was Jaguar/broken Jaguar CD/misc. games bundle. I figured if I could fix the CD unit and resell it, I could probably break even on the transaction overall, netting myself a free Jaguar and a few free games in the process. The seller noted the disc just stopped spinning while testing the unit, so I figured it would just require a laser transport replacement. I ordered a compatible transport from a seller in China at the same time, knowing it would take quite a while to arrive. The transports can be found for as little as $11 with shipping (Just search for Philips CDM 12.1 or VAM1202), so worst case I wouldn't need it and I'd have a spare around.
Well, sure enough, when I got the CD unit, the disk wouldn't spin. I could hear the transport tracking a bit or trying to focus the lense when I powered the unit on with a CD in it, but no spinning. However, after replacing the CD transport, the disk still wouldn't spin. Same tracking, so it didn't seem like the transport repair had gone wrong or the cheap knock-off replacement transport unit was entirely bad. I looked up the data sheet for the transport, and found a 5V current was used to spin the disk motor, applied the current directly to the leads and it did indeed spin, so the motor was functional. I checked continuity between the motor and the header for the power cable on the PCB and visually inspected the PCB for damage, but couldn't find any problems. I was stumped for a minute here.
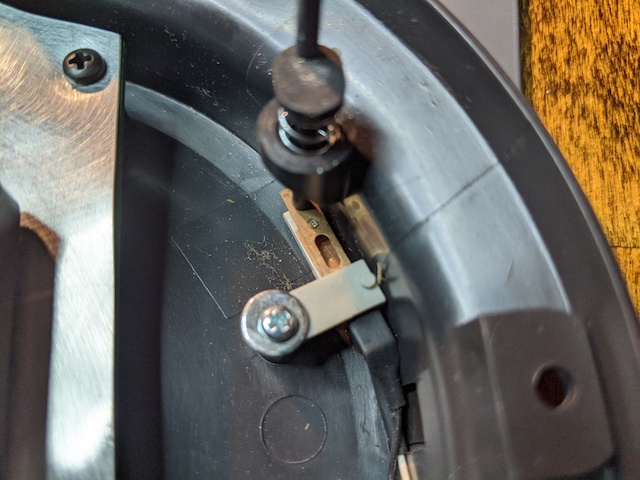
As a last ditch effort, I put the PCB back in the bottom half of the case (again), set a disk on it, and tried powering it up while manually depressing the lid close switch, hoping I would somehow be able to visually idenitify a problem. After doing this a couple of times, I noticed the Jaguar CD didn't seem to be responding at all to the lid switch. Normally it should re-attempt to spin up and identify the disk when the lid is closed, so I should have been hearing the transport unit tracking a bit and/or focusing the laser each time I depressed the switch. I got the unit back up on my bench and inspected the lid switch mechanism in detail.
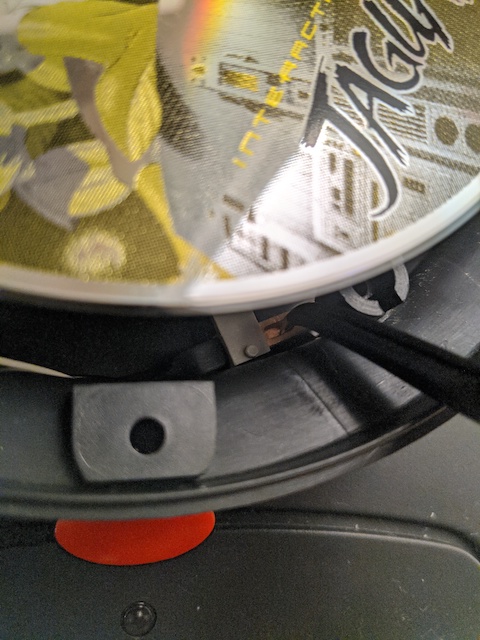
The two metal contacts didn't seem to be making contact when I depressed the plastic rod that activates the switch. I also noticed there was a little cutout in the top contact I could easily poke something through to manually short it. I put the unit back in my Jaguar, put a disk in it again. I got my hooked tweezers out, since the nibs were just the right size to slide through the gap in the switch contacts and short the circuit. If you don't have a similar tool handy, that paperclip you unfolded and used to keep around for force-ejecting CD-ROM drives on your 90's PC or floppy disks on your old Mac should work fine too.

I held my breath, shorted the switch, and powered on the Jaguar.
The CD spinner motor kicked in and started spinning the platter right away!
Back to the workbench, I unscrewed the switch mechanism to have a closer look.

Sure enough, the bottom contact seemed to have bent down, likely just from wear over the years. Additionally, it appeared to have a bit of oxidation/corrosion on it, so I took the opportunity to clean it with a cotton swab and some rubbing alcohol.

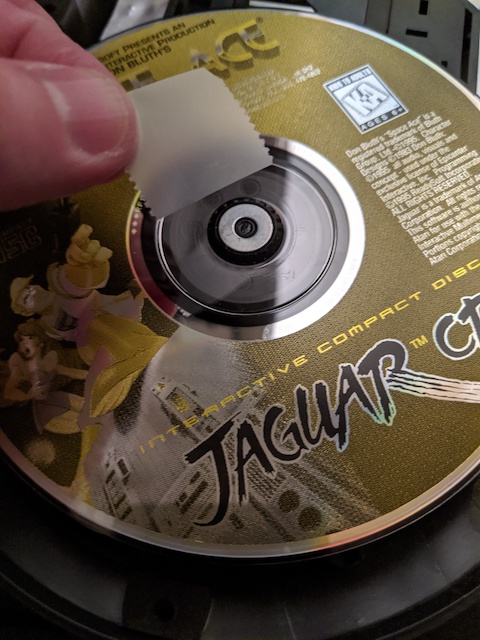
Then I used the same pair of tweezers to carefully bend the bottom contact back up until it was nearly touching the top contact. In my eagerness, forgot to grab a picture of the switch in the fixed state, but in the correct poisition, the two contacts should be just about parallel to each other, and perpendicular to the plastic mounting bracket they're attached to. I screwed the switch assembly back in place, and decided I'd do a full test before completely reassembling everything. To get the CD to spin properly without the lid on, I put a bit of tape over the center of the CD and the platter to secure it, as Linkovitch's guide recommends.
After firing it up, manually shorting the switch again, and waiting many, many excruciating seconds for the Jaguar to validate the CD, Space Ace booted! Incidentally, this is the happiest I've ever been while using my Space Ace CD.

I removed the tape, took the CD out, reassembled everything, and tested a few more games, some retail and some homebrew CD-Rs. The replacement transport was working perfectly, though for all I know the original would have as well. Either way, I was satisified with the result: Another Jaguar CD unit back from the dead.
Back To My Jaguar CD Repair Guides | Linkovitch's Jaguar CD repair guides