Clicking Jaguar CD Repair - Supplemental Guide
Back To My Jaguar CD Repair Guides
|
Linkovitch's
Jaguar CD repair guides
I bought a Jaguar CD from EBay, which was listed as working but making a loud
clicking sound. Having seen
Linkovitch's excellent Jaguar CD repair guides, specifically
this little note on what causes the clicking issue,
and having just learned to solder when building my first BJL cable last week,
I was reasonably confident it would be an easy fix. These are some
additional notes/pictures I took while making the repair, which I thought
might be helpful for other novices like myself. If you're attempting to
repair your limit switch, or replace your transport, I recommend reading
through Linkovitch's guide first, then referring to my notes here, then
going back to walk through Linkovitch's guides step-by-step with my
additional notes in mind.
Before even starting, it's best to verify the issue is actually the broken
transport switch. You can do this by performing a simple continuity test
between the two copper tabs of the switch and their respective ports on the
connector at the other end of the wires.
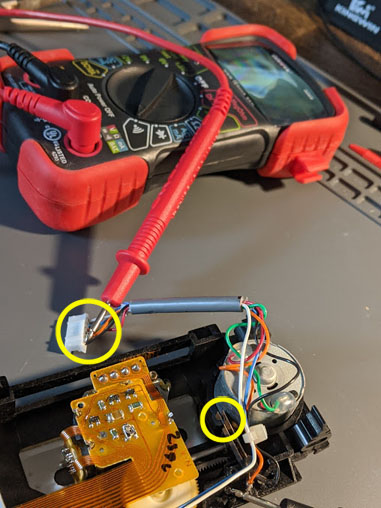 I didn't think to take a picture of this until I was re-checking after making
the fix and was about to reassemble the unit, but you should be able to do
this before going through the trouble of completely disassembling the
transport mechanism, which is the most difficult and risky part of the
repair. If the continuity is good, don't bother. This isn't the issue with
your unit. You might need a whole new transport or something. If you aren't
up to that, send it off to the professionals (I think
Best Electronics offers
Jaguar CD repair, as does this website.
I've ordered some carts from Best, but haven't used either site's repair
services). On my unit, the orange wire was connected (or supposed to be
connected anyway) to the laser side of the switch, and the black wire was
connected to the spindle side, so I just probed those wires at the connector
with one probe, and the corresponding copper tab with the other probe. The
black one was good, the orange one was not, just like with Linkovitch's.
I didn't think to take a picture of this until I was re-checking after making
the fix and was about to reassemble the unit, but you should be able to do
this before going through the trouble of completely disassembling the
transport mechanism, which is the most difficult and risky part of the
repair. If the continuity is good, don't bother. This isn't the issue with
your unit. You might need a whole new transport or something. If you aren't
up to that, send it off to the professionals (I think
Best Electronics offers
Jaguar CD repair, as does this website.
I've ordered some carts from Best, but haven't used either site's repair
services). On my unit, the orange wire was connected (or supposed to be
connected anyway) to the laser side of the switch, and the black wire was
connected to the spindle side, so I just probed those wires at the connector
with one probe, and the corresponding copper tab with the other probe. The
black one was good, the orange one was not, just like with Linkovitch's.
The first thing I noticed when working through the disassembly guide was
that my lid switch connector was slightly different than the one in the
picture in Linkovitch's guide:
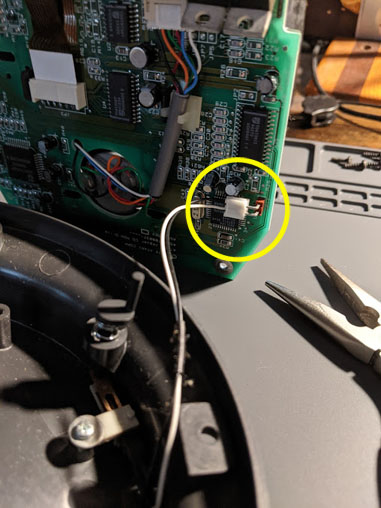 This didn't really affect the repair, but I wanted to note the alternate
config. Various other random components seemed to have slightly different
placement as well. There must have been more than one revision of the PCB,
which is interesting given the claim is that there was only one batch of
these ever made.
This didn't really affect the repair, but I wanted to note the alternate
config. Various other random components seemed to have slightly different
placement as well. There must have been more than one revision of the PCB,
which is interesting given the claim is that there was only one batch of
these ever made.
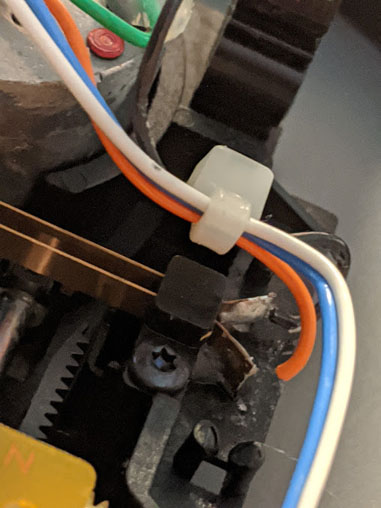
The next thing I noticed was that on my unit, all the transport connector
wire solder joints were covered in hot glue.
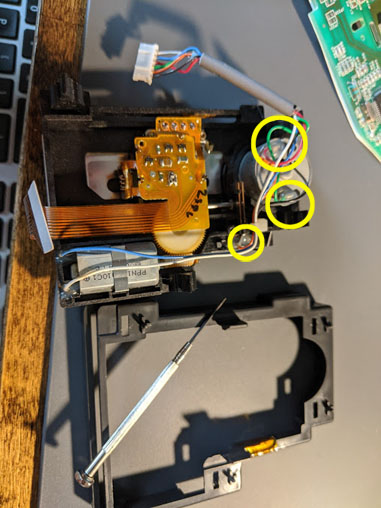
 I don't know if this was from a prior repair, or if again Atari actually did
two production runs, but this required an extra step in my case. I'd never
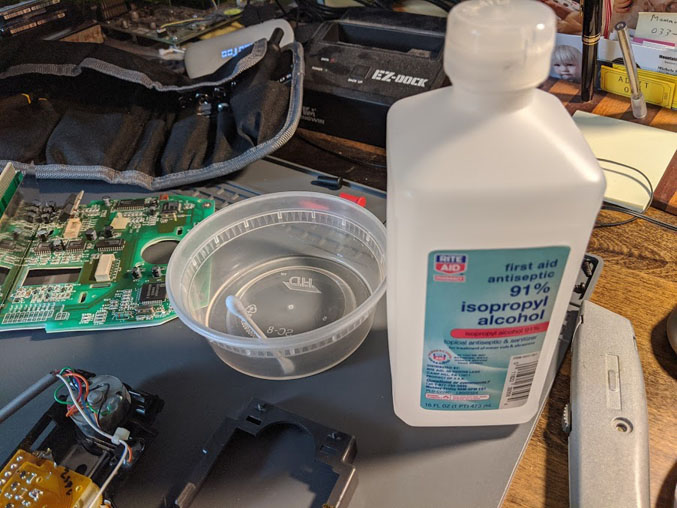
had to remove hot glue from anything fragile before, but a little googling
showed the preferred technique was to use Isopropyl/Denatured Alcohol to
loosen the glue, then your preferred stabby tool to remove it.
I don't know if this was from a prior repair, or if again Atari actually did
two production runs, but this required an extra step in my case. I'd never
had to remove hot glue from anything fragile before, but a little googling
showed the preferred technique was to use Isopropyl/Denatured Alcohol to
loosen the glue, then your preferred stabby tool to remove it.
 The trick here was to rub the alcohol in thoroughly, especially around the
edges of the glue joint, then use my small flathead screwdriver to pry at the
joints a bit at a time, trying to open channels up. Apply alcohol, pry,
apply alcohol, pry, and so on until the glue starts to break down and come
off. Be careful not to pry too hard here: You might snap the tiny wires that
are still connected, or slip and damage the surrounding bits on the transport
unit! Ultimately, it wasn't that hard, and the glue came off cleanly. It
was now clear the orange wire had broken free despite the hot glue:
The trick here was to rub the alcohol in thoroughly, especially around the
edges of the glue joint, then use my small flathead screwdriver to pry at the
joints a bit at a time, trying to open channels up. Apply alcohol, pry,
apply alcohol, pry, and so on until the glue starts to break down and come
off. Be careful not to pry too hard here: You might snap the tiny wires that
are still connected, or slip and damage the surrounding bits on the transport
unit! Ultimately, it wasn't that hard, and the glue came off cleanly. It
was now clear the orange wire had broken free despite the hot glue:
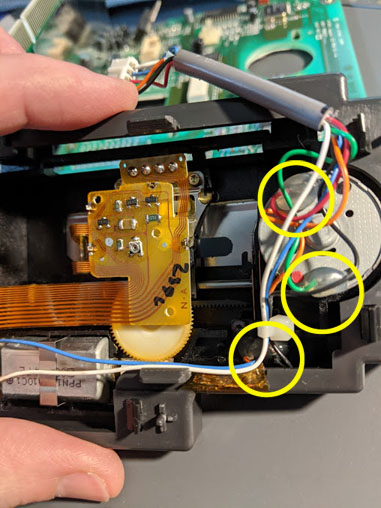
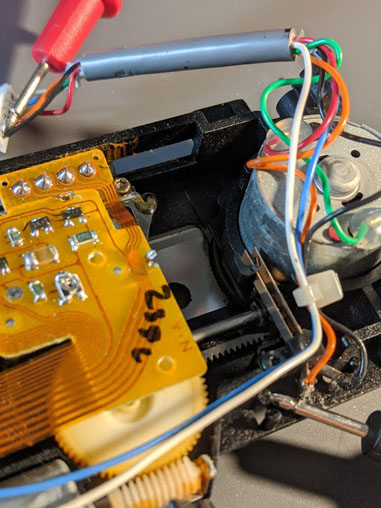
The next step was to strip the orange wire to get something to solder to:
 Then simply tin the wire (cover the tip in solder) and solder it back on to
the switch. Afterwards, be sure to run another continuity test before you
reassemble everything to ensure your solder joint is good.
Then simply tin the wire (cover the tip in solder) and solder it back on to
the switch. Afterwards, be sure to run another continuity test before you
reassemble everything to ensure your solder joint is good.
 Then follow Linkovitch's guide to reassemble the unit.
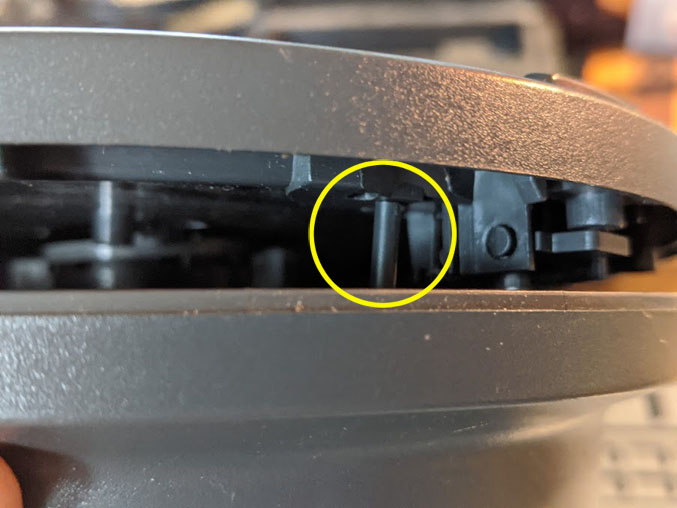
When reassembling, I ran into two more issues. Somehow, probably during
disassembly, a bit of the shielding on the left of the case had become bent
out towards the edge:
 This was preventing the top of the casing from sliding in properly. Simply
bend it back towards the PCB (I removed the PCB again first out of an
abundance of caution, since it takes a bit of force to bend it back) and try
again.
This was preventing the top of the casing from sliding in properly. Simply
bend it back towards the PCB (I removed the PCB again first out of an
abundance of caution, since it takes a bit of force to bend it back) and try
again.
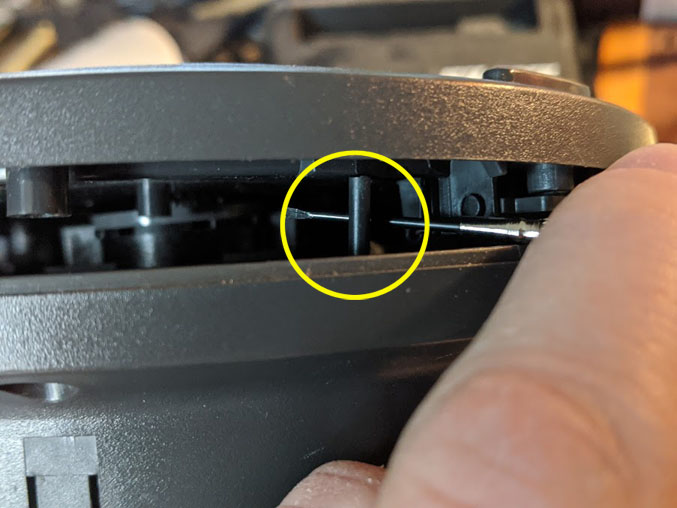
Next, rather than line up the lid close switch first as Linkovitch suggests,
I found it easier to line up the rest of the case first, then nudge the lid
close switch into place with my small flathead screwdriver/favorite tool:
 But to each their own.
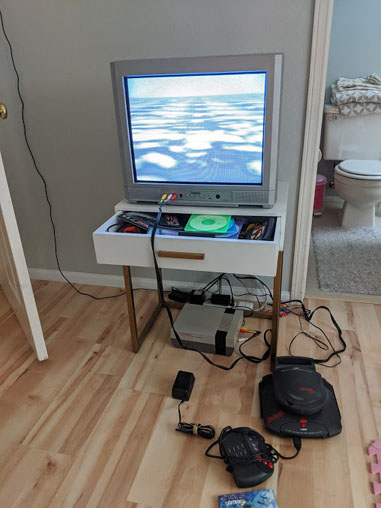
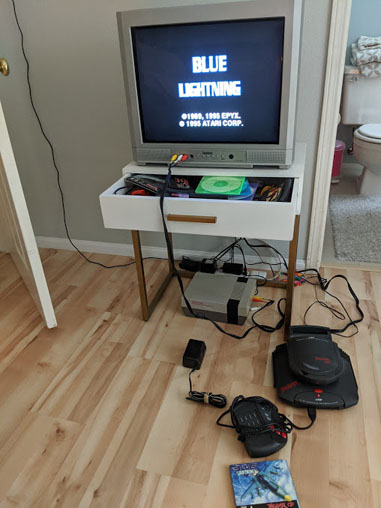
And that was it. The rest was straight-forward. Was the operation a success?
F**k yes it was! The unit is now click-free and working perfectly!
 Thanks to Linkovitch for the guides, and everyone else who has posted helpful
information about issues with the Jaguar CD on the
AtariAge forums over the years.
Thanks to Linkovitch for the guides, and everyone else who has posted helpful
information about issues with the Jaguar CD on the
AtariAge forums over the years.
Back To My Jaguar CD Repair Guides
|
Linkovitch's
Jaguar CD repair guides
By: cubanismo/James Jones